/ˈwʊdi/
noun
A home rock climbing wall.
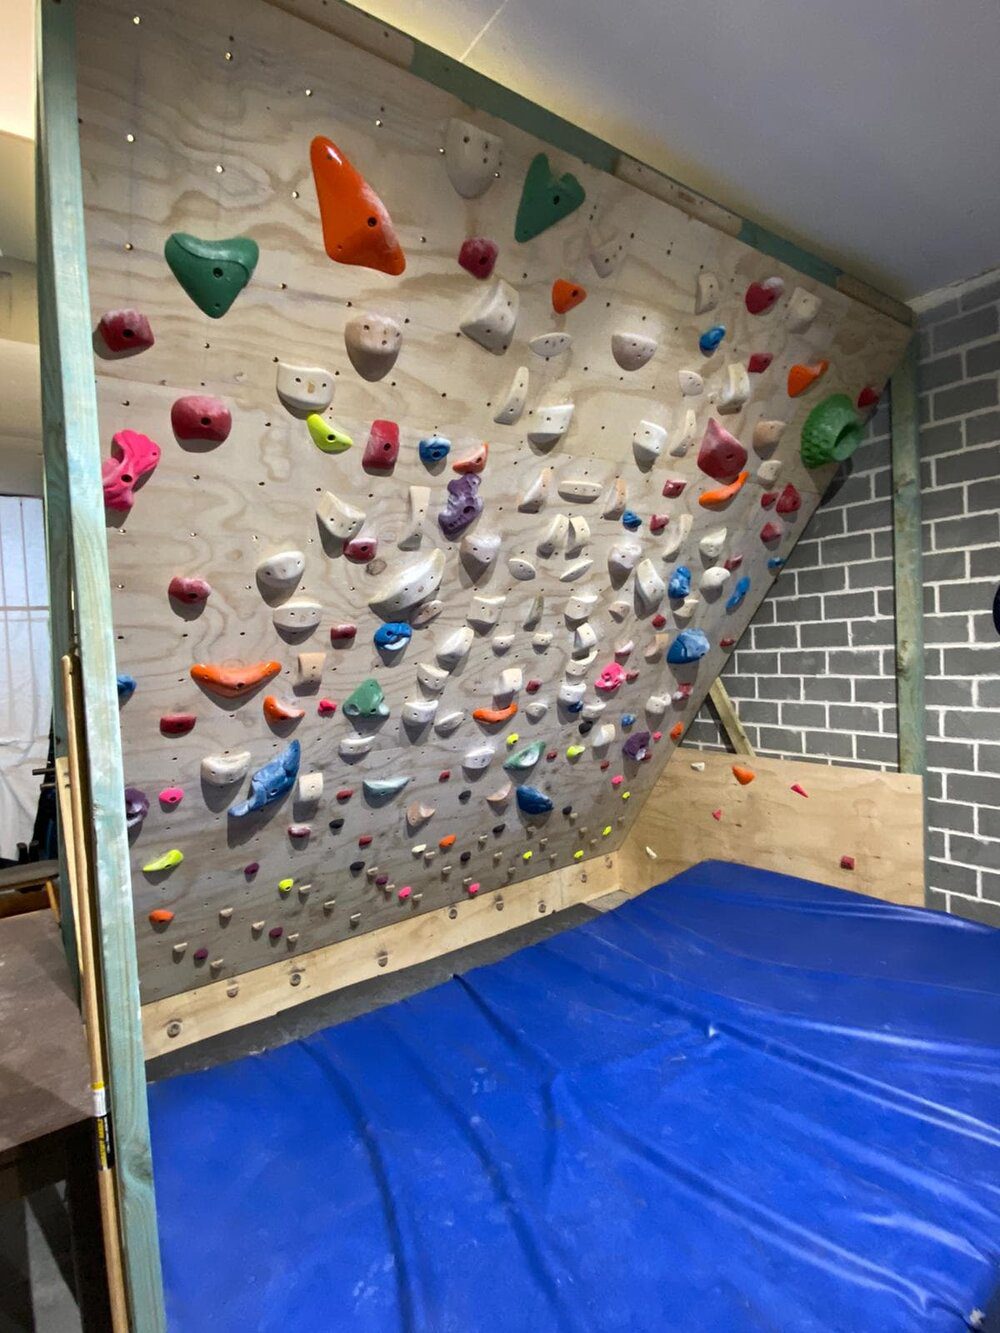
"I've been training on the woody, aka the Climb Fit 0.5"
With climbing gyms shut temporarily and only a handful of reasons to leave the house - it's no wonder there is a slew of home climbing walls suddenly being built. As climbers, there's no doubt we've all considered it, so what better time to start a project than now!
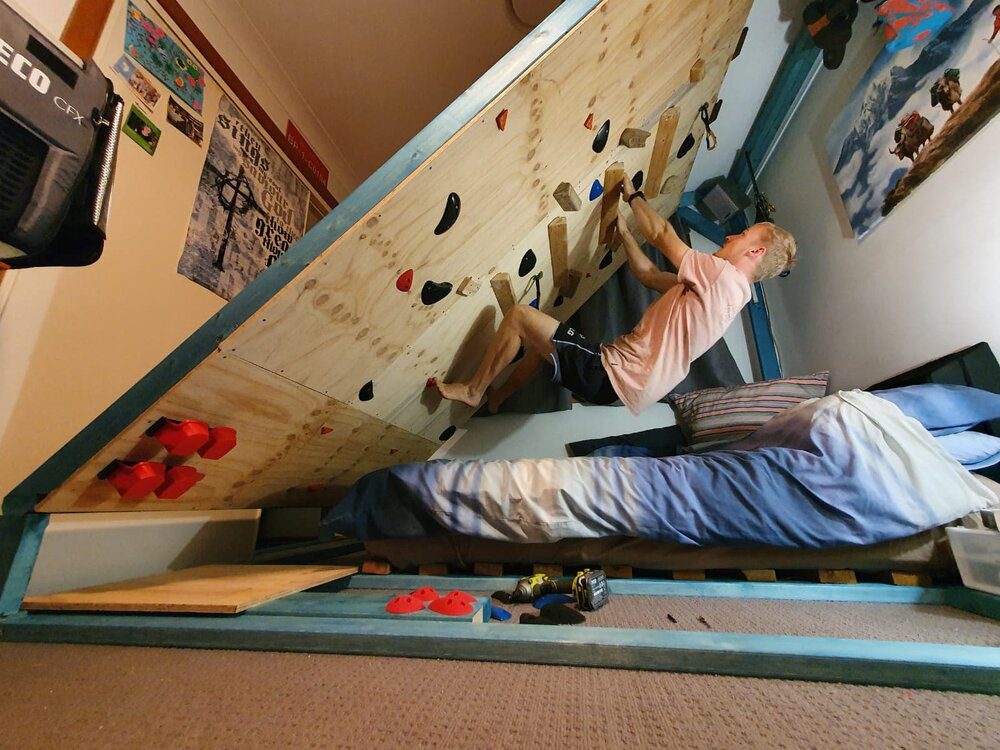
image credit - www.instagram.com/coreymoes/
Building a woody is actually quite simple - however, there are definitely some considerations to take into account when designing and building one. Under no circumstances should it be hastily thrown together haphazardly like a scrap wood finger trainer... the last thing you want is a massive wall crashing down on you!
Climbing walls are often put under an incredible amount of stress, from the dead load (the wall itself), and the dynamic load (the climber moving around). The support for the wall, whether freestanding or built into an existing structure, must be strong enough. Before committing to the build, be sure that the structure will be strong enough to support the loads - if in doubt, consult an engineer.
Choosing where exactly your wall will go is pretty crucial and will be the main factor in the type of wall you build. If you're fortunate enough to own your home and can freely renovate, you may be able to make use of the building structure itself.
For those renting, you'll likely need something freestanding either in your garage, or anywhere else you can find space. No one's going to judge you if you have a climbing wall over your bed. That's actually a pretty decent bio. You'll also need to take into consideration the area around the wall. You don't want to be landing on a stack of old paint tins or that hedger you swore you'll make use of.
Try to take into account all possible factors - the last thing you want is a surprise that throws your plans out of whack!
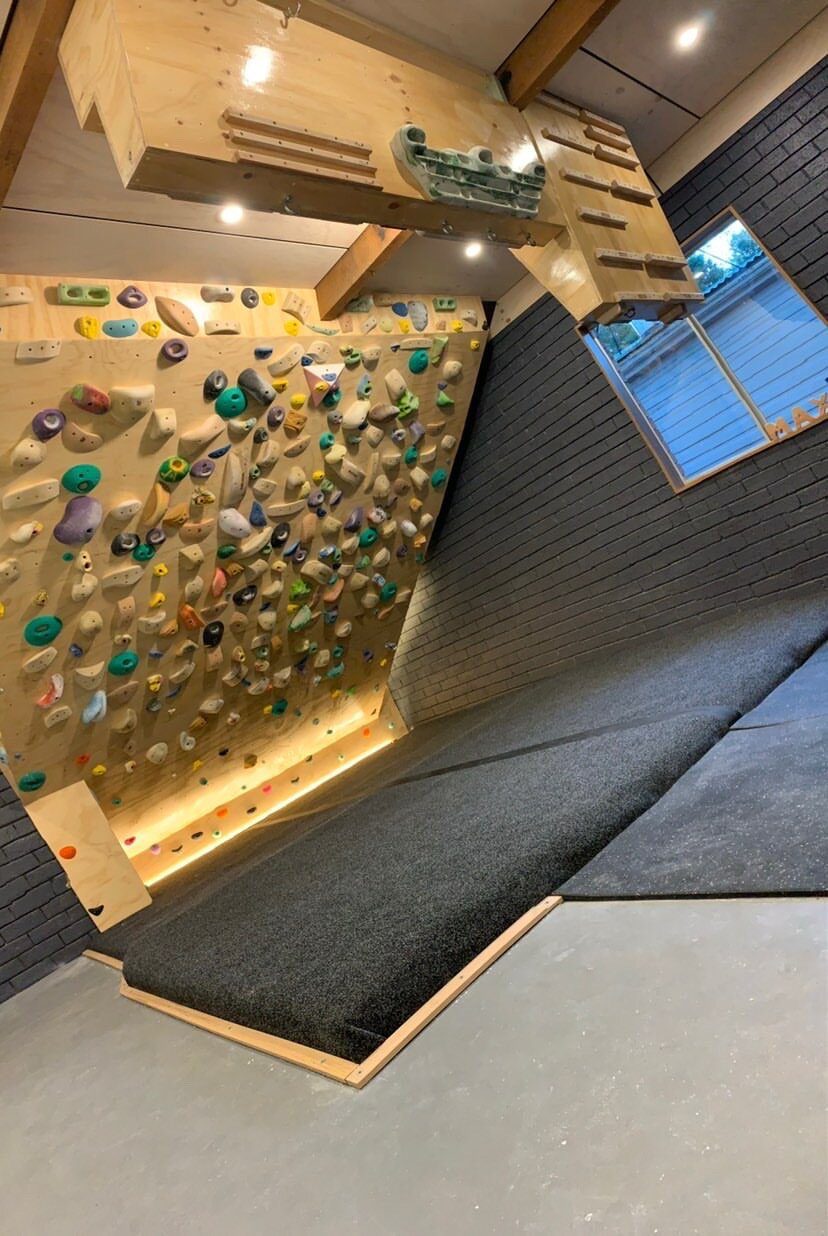
image credit - www.instagram.com/andreahah/ website - moveclinic.com.au
Once you've picked your spot, the real fun bit is designing what will go there! The design stage is by far the most significant part, and the most important.
You have the full breadth of your imagination here - just don't go too wild. The more complex your design is, the more you'll regret it once you try and cut the 700 pieces of wood for the frame.
Also, as much as cool angles and a wicked-looking gym inspired wall may be, if you've only got space for a 3x3m wall, you'll get really bored of the same wall angle over and over again. Also, if you create a vertical face or a horizontal roof - that also becomes a little boring to set.
The most common and functional shape for a wall to train on is flat. Boo, how boring - I know - but hear me out. You'll be able to make use of all the climbing holds you have, without being restricted because of angles, and can train moves evenly and symmetrically.
One of the most significant design factors you'll need to think about is the angle of your wall.
Steep walls are obviously more aggressive and physically more demanding. However, a wall that's not steep enough could quickly become too easy! Depending on your ability, 20° to 40° is the sweet spot.
A steep wall may seem daunting, though remember this is only a small wall where you'll only get 4 to 6 moves in - so they'll need to be hard moves to make the most of it. Think back to those sweet, sweet sessions at the gym and think about how the angles and overhangs felt there - keeping in mind, this wall will be mostly for training. Or maybe, you can build something adjustable. Me oh my.
The size of the wall will obviously be dependent on where exactly you plan on putting it - however, another factor to take into account is the size of plywood that you're planning to buy.
For example, if the hardware store sells plywood in 1200x2400mm sheets, you'll want to plan a wall that makes the best use of that wood with minimal wastage. Ie. If you buy 3 of those sheets, you could easily make a frame 3600x2400mm (three sheets tall) and not need to cut a single piece of plywood!
What about if you plan to put your woody outdoors? No matter how creative you get in building a cute roof, you'll also need to step up the quality of materials. We're talking a treated pine framework, and marine plywood for the face - not to mention fasteners that won't degrade, as well as t-nuts and bolts that are stainless steel.
The support and structure of your climbing wall are absolutely critical. Climbing walls are HEAVY. Whether you decide to build your wall into an existing structure or make it a freestanding wall, you need to be absolutely sure that it's as bomber as a #21 cam. There's plenty of resources online with the finer details of the engineering, so here's a few of the more comprehensive:
https://www.metoliusclimbing.com/pdf/How-to-Build-a-Home-Bouldering-Wall.pdf
https://www.instructables.com/id/Home-Bouldering-Wall-Woody/
When it comes to drawing up your design, a fundamental engineering mind will help. If that's not you, find someone that fits the bill! Some basic ideas will help create a more substantial structure, such as understanding triangles and assembling the framework, so the wood is stacked in compression rather than relying on the strength of the fasteners - and make sure every measurement and piece of timber is measured well and accounted for.
Draw it out, write out the numbers, then check it. Then check it again. Or - teach yourself how to use a design program or to get a crisp 3D image of your design in your exact space!
Google SketchUp has a free version that's intuitive, and more than powerful enough.
image credit - www.instagram.com/orical_obi/
You don't need to be a chippie, but a good understanding of some tools is definitely required, namely, a mitre saw or circular saw (with a steady hand), a drill (drill driver and impact driver) and a tape measure, along with some good old fashioned math.
Some other little bits and pieces will also help, such as;
a set square,
sawhorses,
clamps and a chalk line (for planning out t-nut placement).
The old adage is absolutely true:
Measure twice, cut once.
It's in bold and italic, so you know it's essential.
When it comes to fasteners (screws etc.), don't skimp out on these either. With so much force being applied to the whole frame, you'll likely want 14G Batten screws to hold the structure together. Screws aren't as strong in shear as they are in tension, so keep that in mind.
Oh, and put some damn ear muffs on.
The plywood you use for the face of the wall must not be less than 17mm structural ply. A decent amount of the rigidity comes from the ply itself, and anything less sturdy won't do. Besides, as cool as it would be to say you broke the wall by being so strong that you ripped half the holds off - it'll probably hurt.
Different quality plywood finishes exist, so find what fits your budget that has a nice face. Whether you stain it, paint it, or add some texture is also up to you! Tip: Check the hardware store for wrongly tinted paints as they often go cheap.
When it comes to spacing out your T-nuts, decide on a pattern and layout that will future proof your woody. For example, you may just start with a random splattering of holds, but perhaps in the future, you'll want to buy the hold set and LED's for something like a Kilter Board? If your hole pattern already matches that of your' end product', then it'll save you a lot of grief in the long run.
Place your T-nuts, after you've painted - otherwise, they can get clogged. Also, place your T-nuts after you've cut your ply; otherwise, you'll send T-nuts flying off of your saw. Also, be sure to place your T-nuts after drilling the holes, because… well yeah.
We'll keep the holds and route setting discussion for another conversation since that's a whole new can of worms - but you don't need to pack out every t-nut on your board straight away. Start small - heck you can even make your own holds to start with, with a few pieces of wood. Get creative!
A few of our members have also offered some tips that they learnt building their own home wall:
"Use a chalk line to mark out your T-Nut placement. Rather than measuring out each hole, just mark a grid and drill where the lines intersect." - Casey
"Use a spade drill bit! Way quicker than whatever you call regular drill bits." - Jeremy
"If you're bringing wood into your house, try not to hit it on every wall…" - Corey
"Know people that can build the wall for you." - Casey (again)
At the end of the day, building a climbing wall in your home, garage or back yard isn't as scary a venture as you may think. Hopefully, with the above little tips and tricks, you too can give yourself a woody - then you'll have no excuse left to skip a session!
h2 style="white-space:pre-wrap;">Climb fit Pro Shop
Grab a bargain today with hold kits from SO iLL and Unleashed climbing. Make that woody a reality!