While climbing gyms have been closed and we've been staying at home, many of us have been looking for options to keep fit and psyched. There are loads of cool DIY projects being attempted after years thinking about them- at least that's the case for me with this project.
I've always wanted to make a rope mat, but always thought it would be too difficult. Well, I can now say I've joined the ranks of the bread-making/gardening/puzzle-doing citizens and finally given it a go. And it's actually very straightforward.
1. You have some old rope that you don't trust to climb on any longer, but don't know what to do with it. This could be the perfect way to give it a final resting place.
2. You've recently started climbing and don't have a rope, or have a bright shiny rope too new to be sacrificed, but you still want to try this. You could buy some cheaper, smaller diameter cord and make some coasters or placemats instead of a mat! Or look for some offcuts from stores or friends.
There are many patterns available for rope mats, ranging from something as simple as a coil to more intricate patterns that will require building a working platform with plywood and nails. The design I picked for my first rope mat is somewhere in the middle- you'll follow a weave pattern, but it doesn't require anything except your retired length of rope and a couple of spare hours.
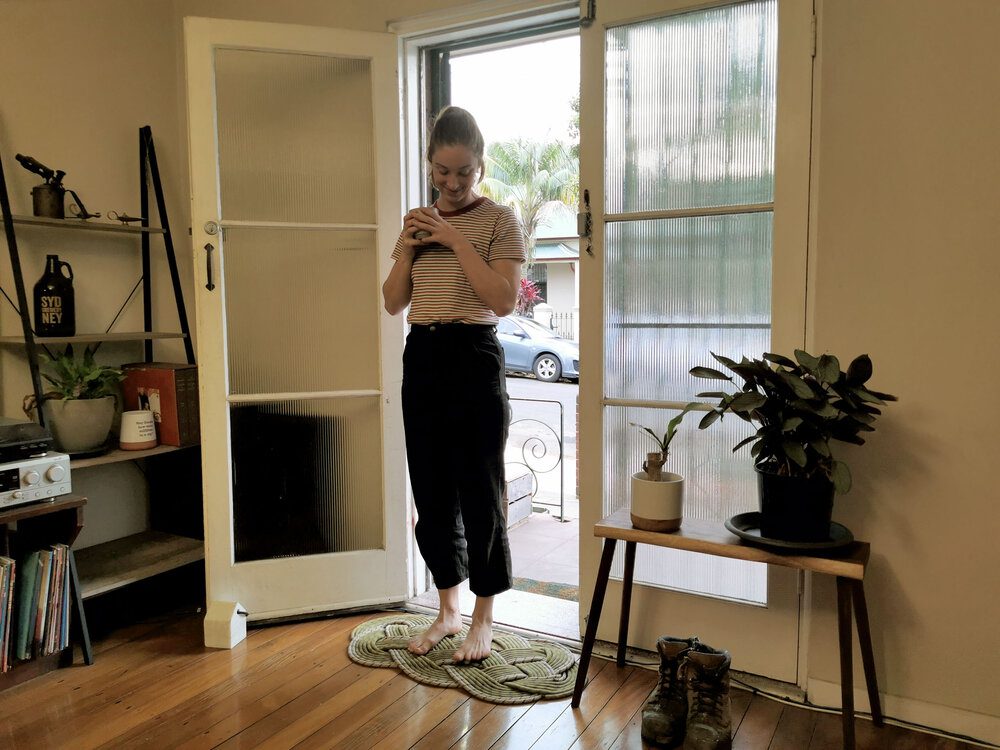
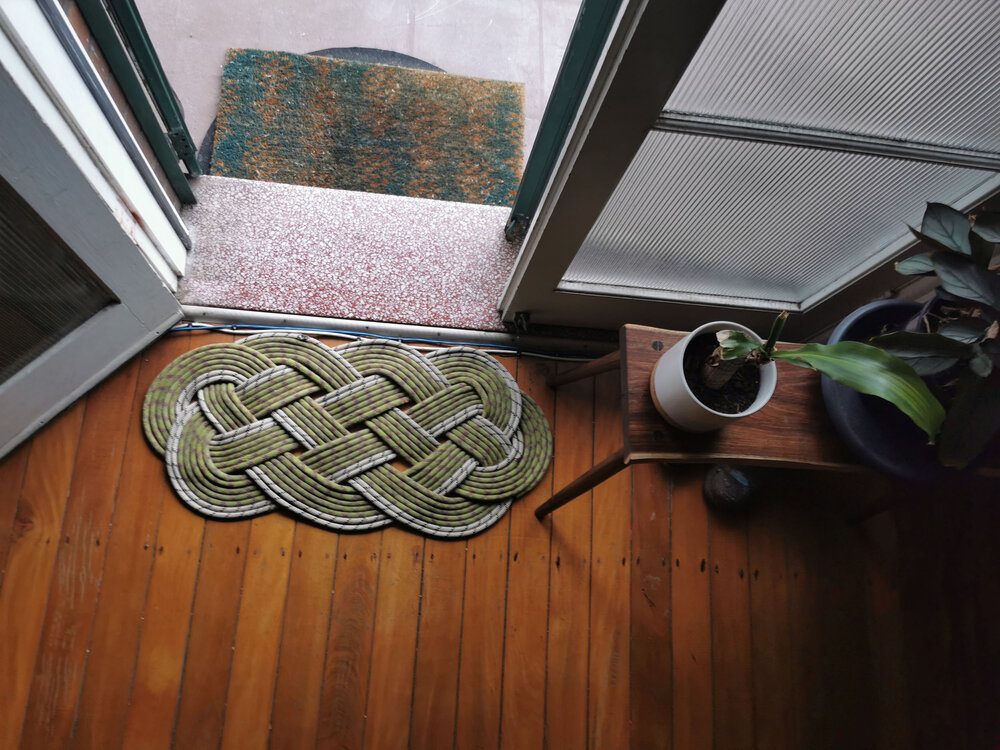
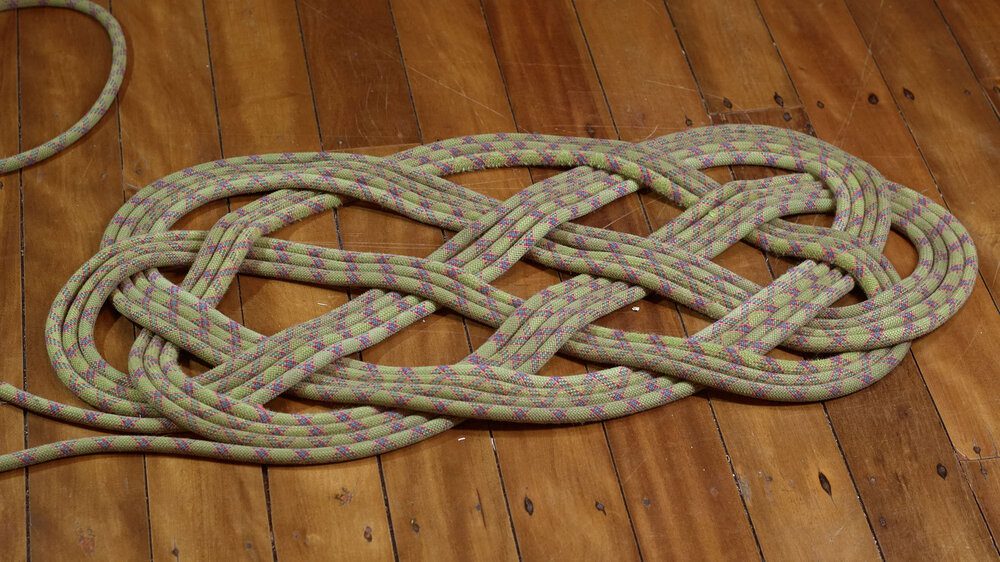
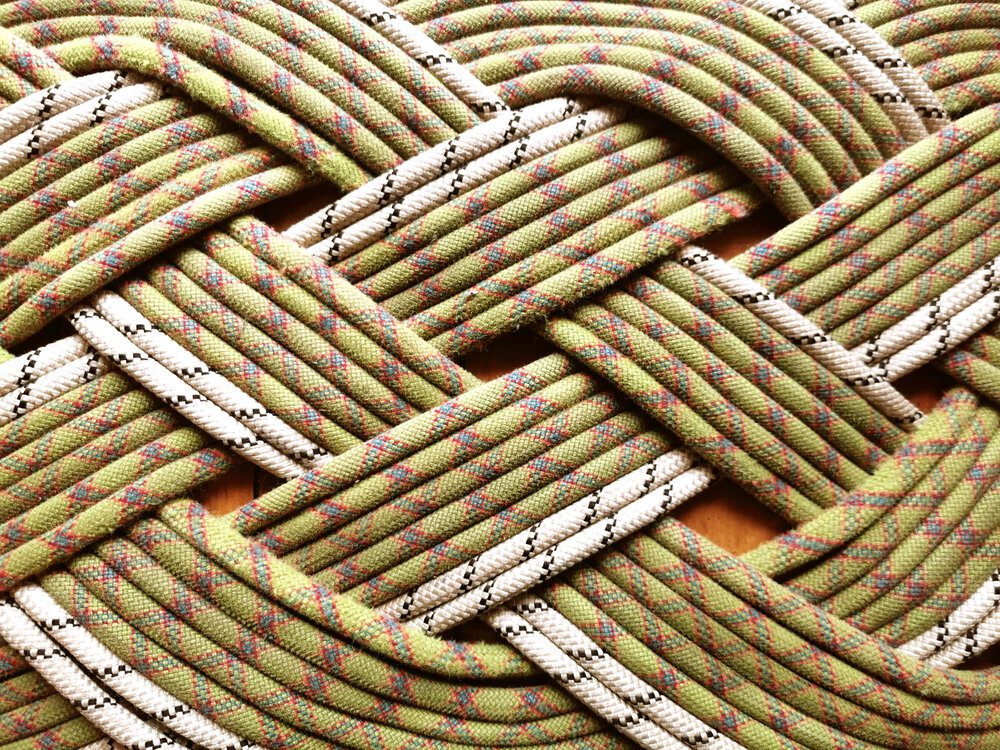
This mat design is known as an Ocean plait or Nautical weave, and it's built upon the simple overhand knot as its starting point. With my 35 meters of 9.8mm rope, I ended up with a mat 400 x 800mm, a perfect doormat size. I added some different rope at the end because I had more room for it and wanted to fill in the gaps.
You could definitely try something more substantial with a 60m rope. Still, for these kinds of lengths, I would strongly recommend cutting your rope into smaller sections and then melting the ends together as you go to make this endeavour more manageable. It's up to you- just be prepared for feeling like you've been comp belaying all day by the end of it!
Note: Because we're not using a template here, it's going to be up to you how tight you want your mat to be. For the same length of rope, you could end up with something larger but with a looser weave or smaller with a tighter weave (no gaps).
I tried both and think they each look great, but just keep in mind that this is kind of like the freehand version of making these mats, and you might end up either needing to add on more rope or cut some off at the end if you can't fit it in.
What you need:
Your old rope or cord (consider washing first if it's dirty from a life well-lived)
A decent area of floor space
What's nice to have:
A second set of hands to help feed the rope to you
A lighter to melt the ends of the rope together if you're joining sections
Glue to secure down a few points of the mat to make it stay flat and intact if you're planning on using it as a doormat (you could also stitch it).
h2 style="white-space:pre-wrap;">STEP 1
Getting started. I referred to the website Animated Knots to kick me off with this weave. This website is incredible, and clearly shows and explains how to tie knots within a range of categories from decorative, to climbing, to even surgical. Find the Ocean Plait Mat and get your basic knot started. You might also find it useful to look at some YouTube videos, especially for the technique of actually managing the rope later on.
h2 style="white-space:pre-wrap;">STEP 2
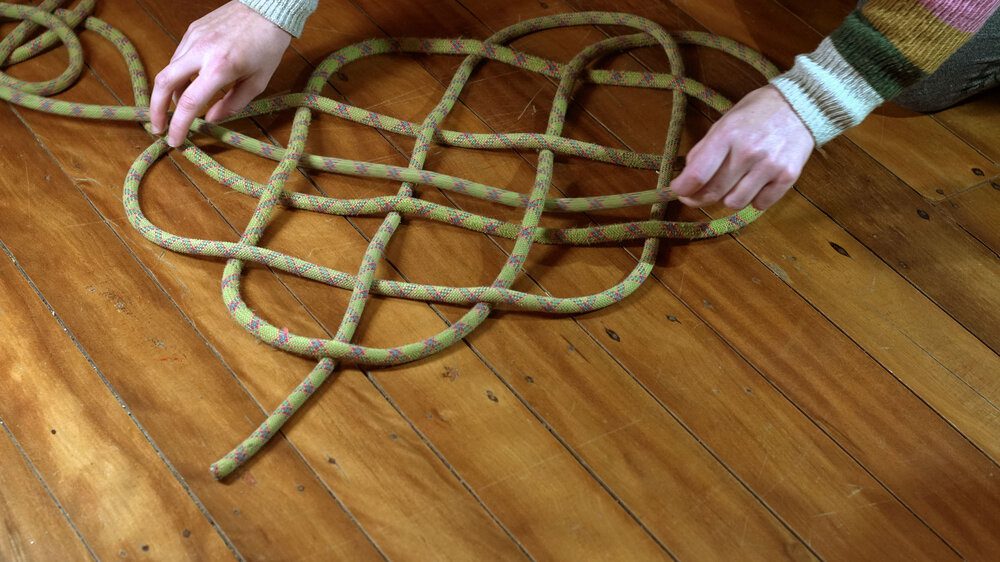
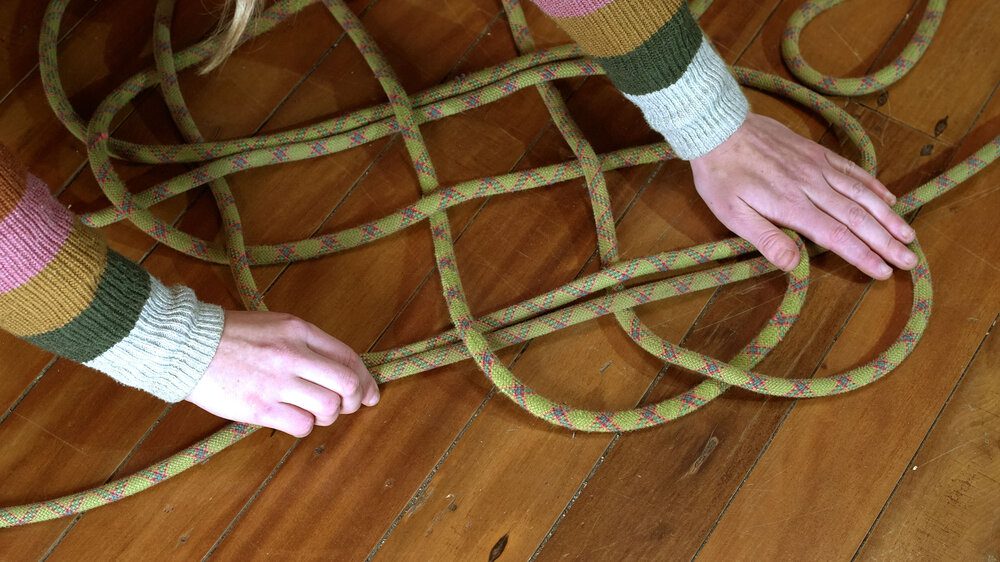
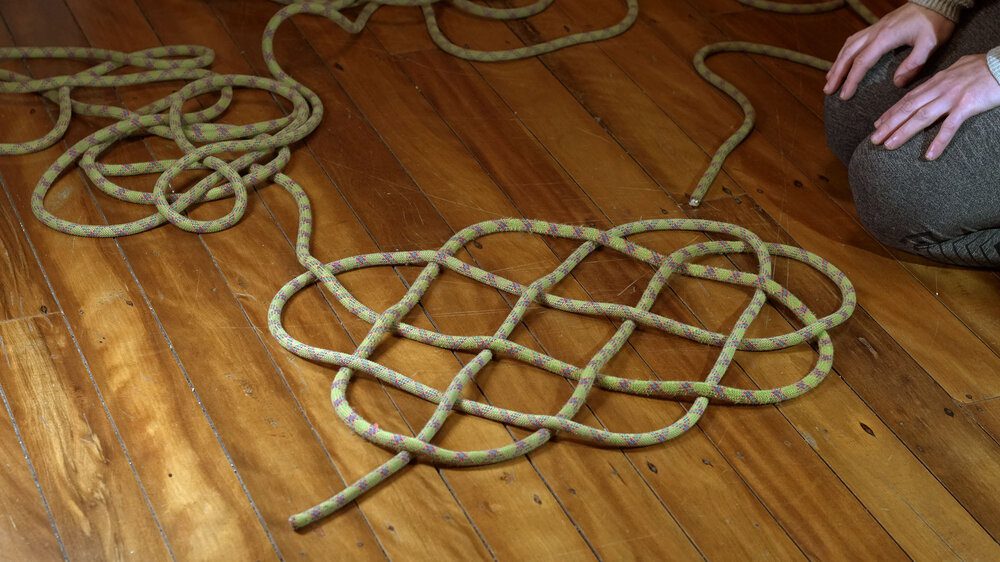
Once you've got that first weave laid out in front of you, take some time feeding in or taking out the rope to get the rough size you want and make all the sections nicely spaced. Between this starting point and the end result you'll be adding more passes of rope, adding width to the mat and filling in the gaps, but the length won't change.
If you've got somewhere near 30m of 9.8 rope, I suggest making the length about 700mm, and you can always tighten it up at the end. Once you've got the length, widen out the weave so that all the sections look equal.
h2 style="white-space:pre-wrap;">STEP 3

Follow the weave until you run out of rope! I found it useful to use my hands and feet to anchor down the mat when I was pulling rope through, so I didn't accidentally yank the weave out of place.
h2 style="white-space:pre-wrap;">STEP 4 (Optional)
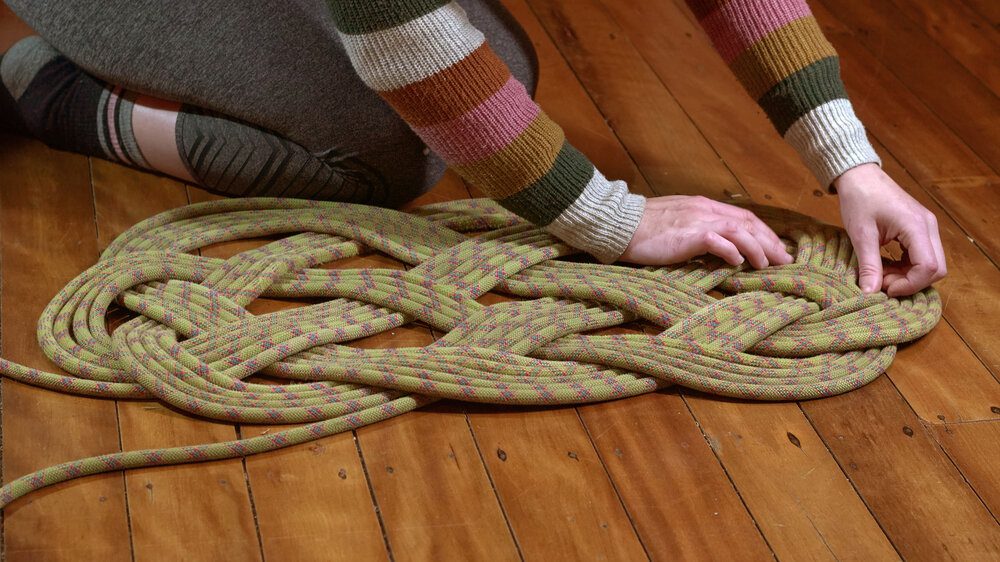
Glue or stitch sections of the rope down to make sure they don't move over time, especially if it's going to get a lot of foot traffic.
h2 style="white-space:pre-wrap;">STEP 5 (Compulsory)

Point out to everyone who visits your home that you made it and enjoy the compliments.
I hope you have fun with this project, I certainly did. There's something beautiful about weaving the memories associated with your rope into a mat- I hope when you look at yours, you think of friends, trips, failures, sends and epics.
Emily X
Emily is a Climb Fit crew member and route setter at Climb Fit Kirrawee. In between trying to tick off climbing projects from a list that keeps growing, she enjoys DIY projects that help to keep stuff out of landfill.
