While our climbing community is usually pretty motivated to get into the gym or outside to get their movement and exercise fix, sometimes that’s just not feasible. Be it weather, life getting in the way of living, work pressures, or other larger-scale issues. When this happens, we have to try to keep a focus on our goals, and if climbing fits into your goals somewhere then you’ll want to know how to keep your training alive and well while you’re unable to hit the walls.
One way to do this is to keep up some form of home training which is getting a lot of attention at the moment, with people trying to find solutions that allow them to maintain their strength and fitness without access to climbing walls or specific training tools.
But what about the muscles you forget to train?
These are the muscles that do the opposite of your climbing movements – the push vs pull – and we train them with what we like to call antagonistic exercises. Without going into explicit detail, it’s important to remember that balancing your strength out will give you benefits that reach far beyond the mirror. Training your antagonist muscles will help with maintaining stability at your joints, avoid injury and actually make you stronger in the long run.
So, instead of setting yourself up with a routine that just trains the same old climbing strength over and over, why not try adding some of these into your routine.
The Wrist roller is a great tool to help improve wrist mobility, which is often overlooked by climbers. Simply wind it all the way down in one direction going hand-over-hand, keep going until it comes up, then reverse direction and repeat. You’ll want to keep your elbows straight to make sure your wrists are getting the work, and try to stop your shoulders creeping up to your ears.
This one has to be everyone’s favourite bodyweight exercise, and while there are hundreds of variations to make it harder, it’s vital to get the basics right. Start lying down, with your hands under your shoulders then raise to either your knees or feet

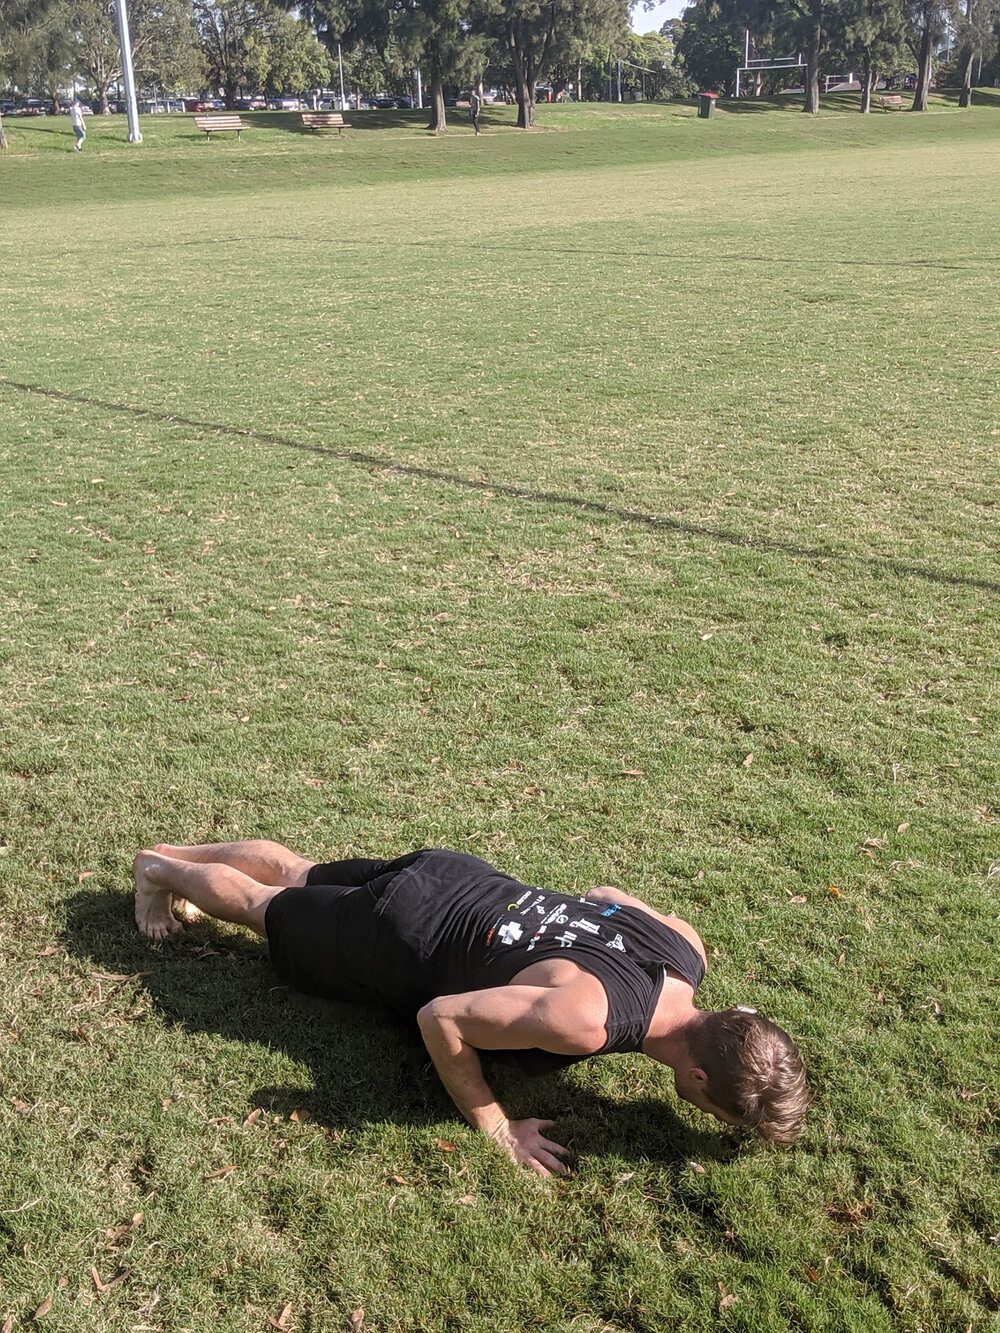
Fire up those abs to get your hips tucked under – this helps support your lower back. As you lower, think about only bending from your elbow to lower slowly then back up.
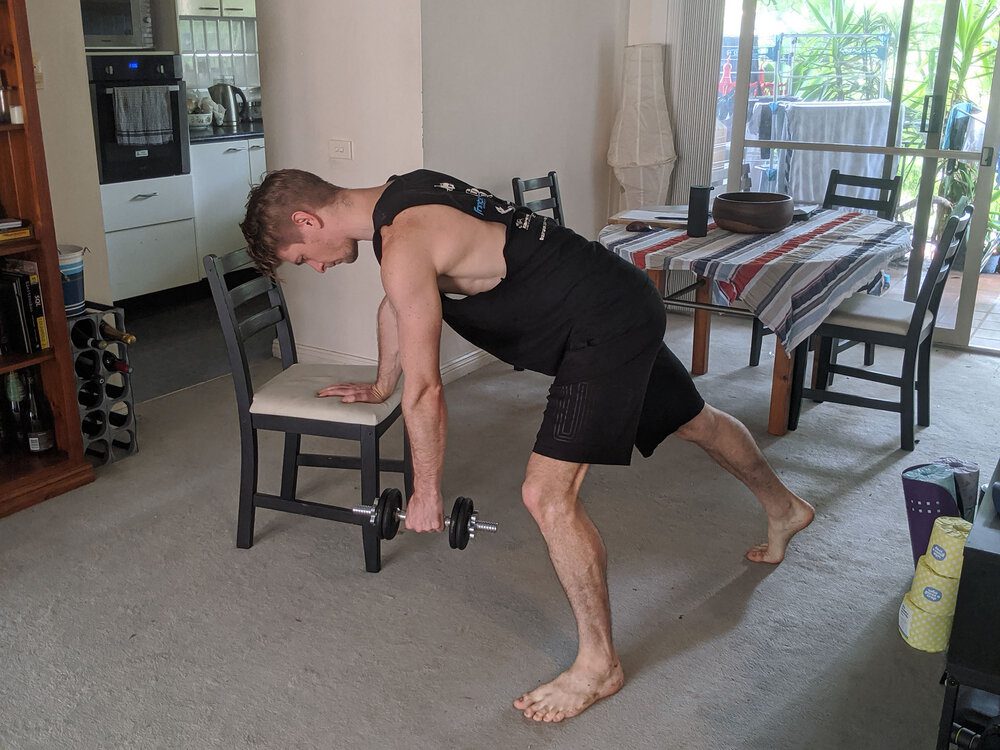
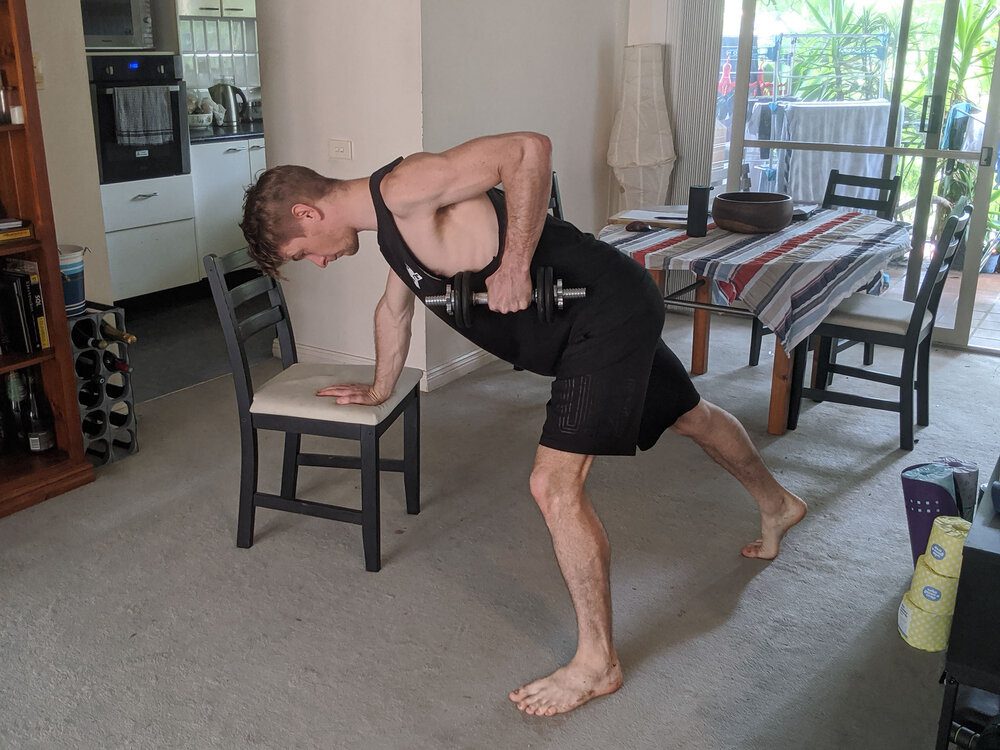
If you have a dumbbell or other weight around, you can start balancing out your pull to help bulletproof your shoulders. Place one hand on a chair, low table, sturdy box etc.
Step your opposite foot out to the side and the other one back. The goal here is to get your torso near horizontal, so play with the foot positions a little.
From here take your weight in hand and lift to your ribs, keeping your elbow in tight as you go. Make sure you keep your supporting shoulder stable, or you’ll collapse as you move.
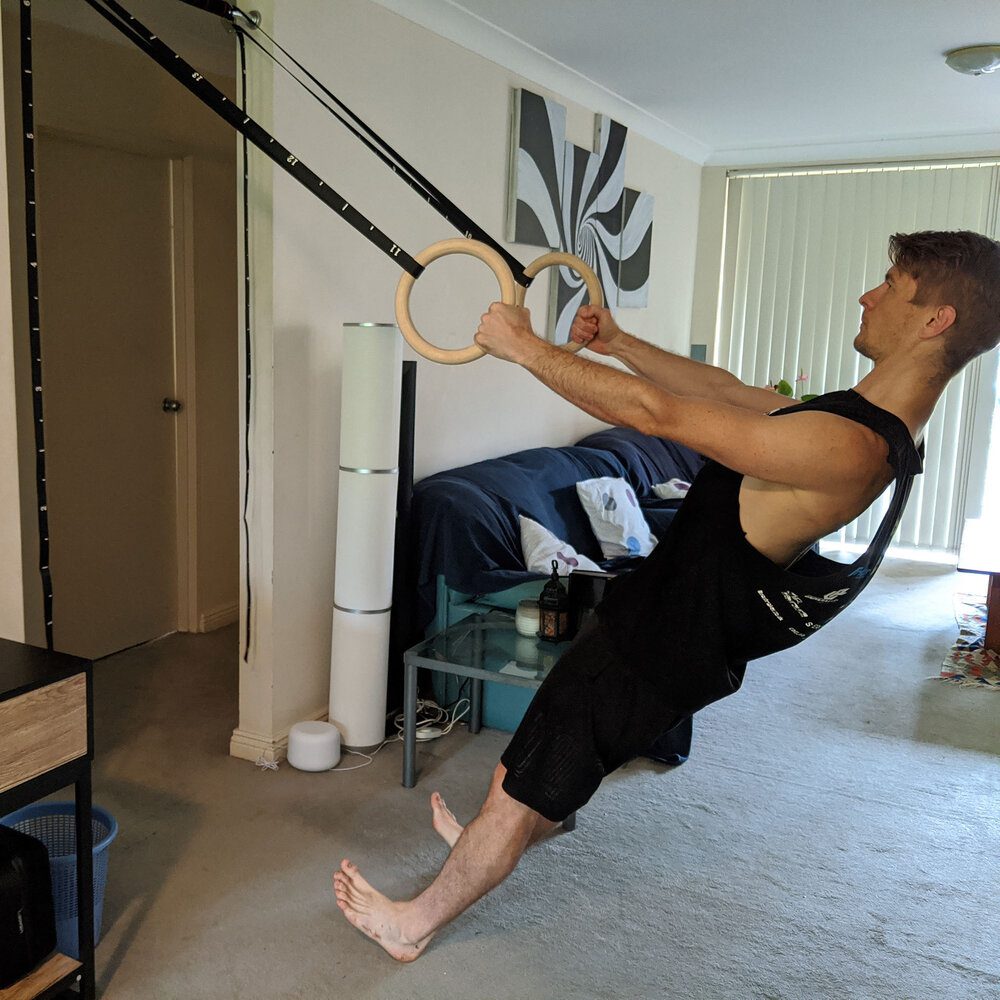
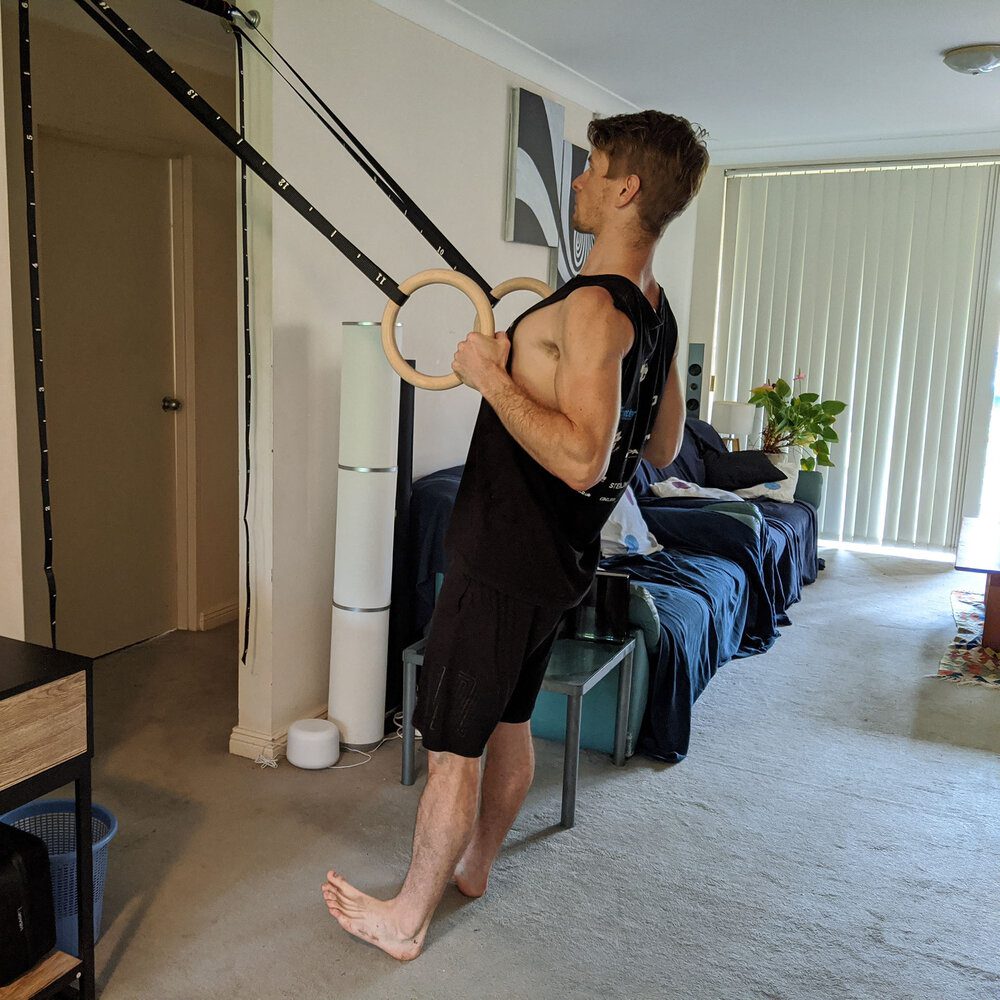
If you’re lucky enough to have rings, TRX or similar at home, these are a great alternative to the previous exercise. Start by leaning back on the rings (beginners should start with feet roughly under hands when leaning back) and pull to your ribs to lift yourself.
The challenge is to keep your body rigid as you lift, not leading from the hips or letting them sag behind. To progress, inch your feet further under your hands – just make sure you’re maintaining form as you make it harder.
TIP: if you place your weight on your heels and lift your toes to your shins, you’re less likely to slip.

Deadlifts have a reputation for being dangerous and scary, but they’re relatively straightforward to tame. This single-leg variation allows you to keep the weight low but adds the complexity of balance and keeps you working across your body.
Start with a lightweight in one hand and challenge yourself to balance on the other foot. From here try to keep a straight line from the heel of your lifted foot to the top of your head as you hinge on your leg.
Keep your arm straight to lower the weight to the ground, then get that butt firing to come back up. Just like the dippy-bird, this exercise will have you coming back for more.
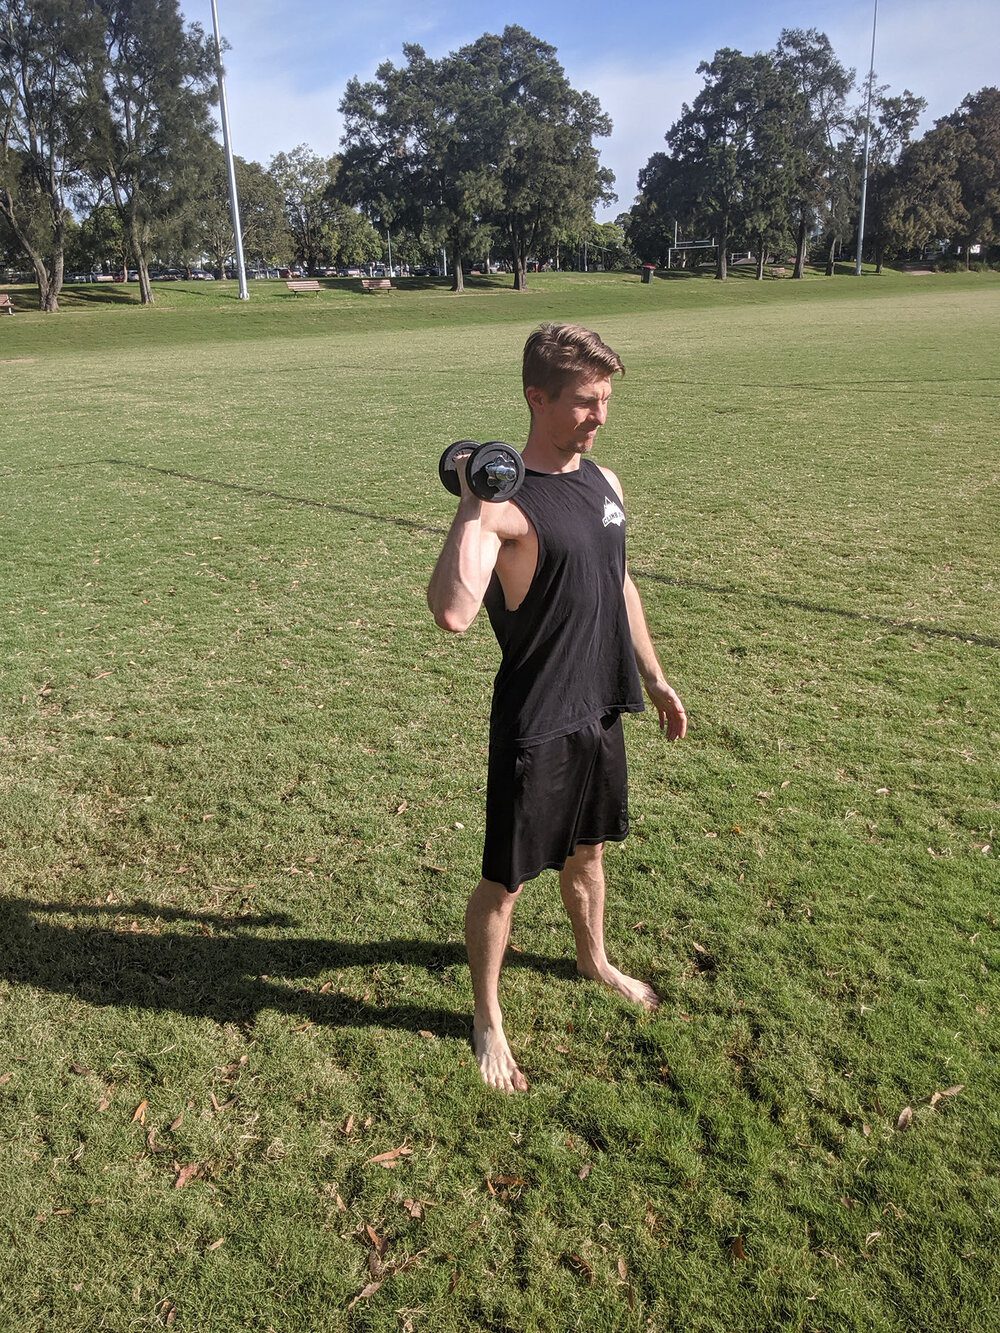
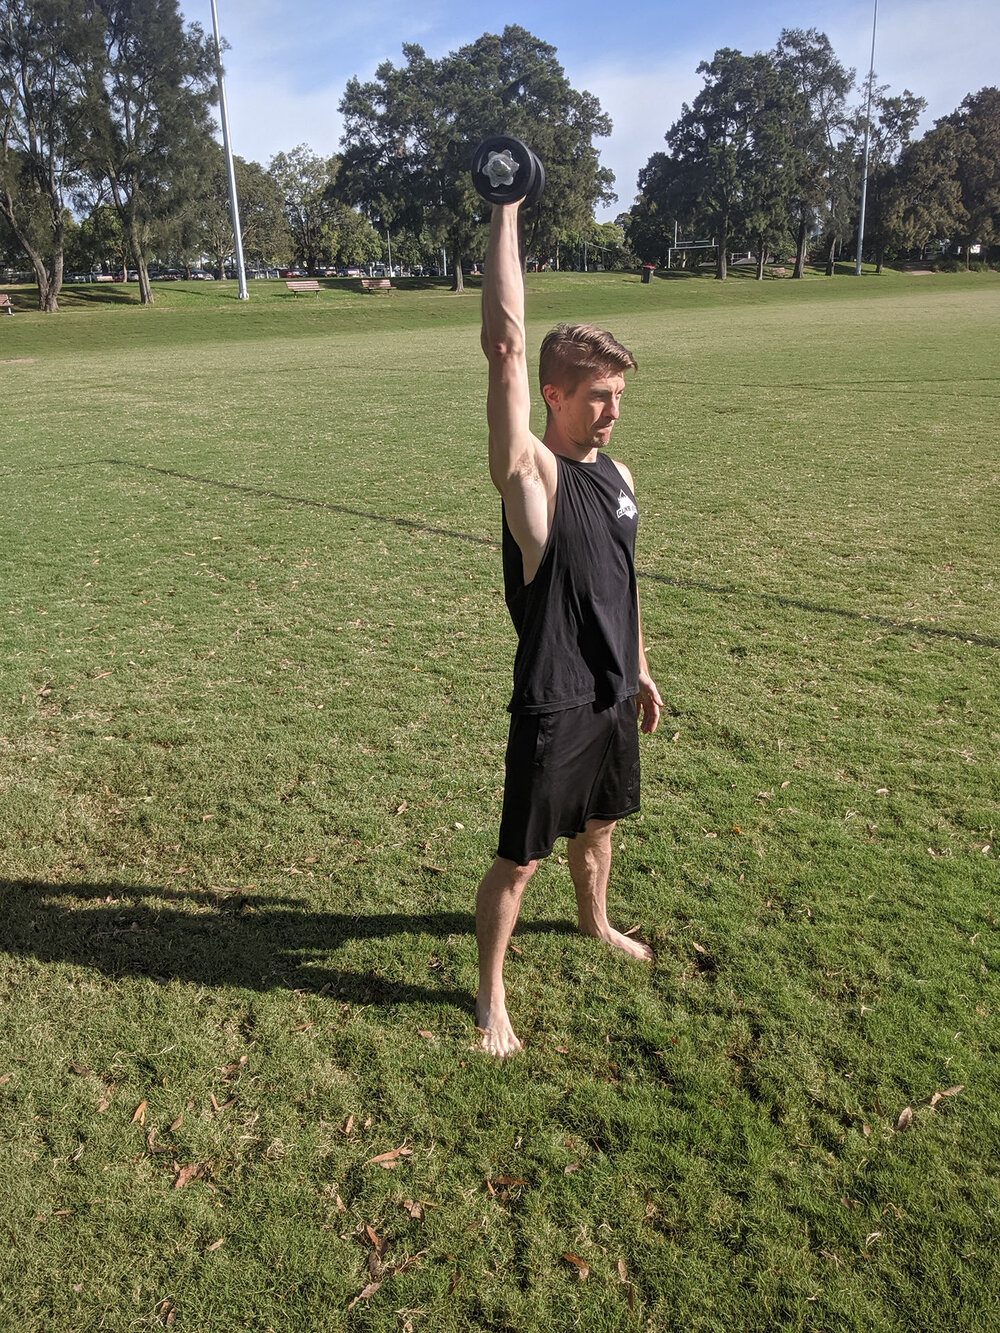
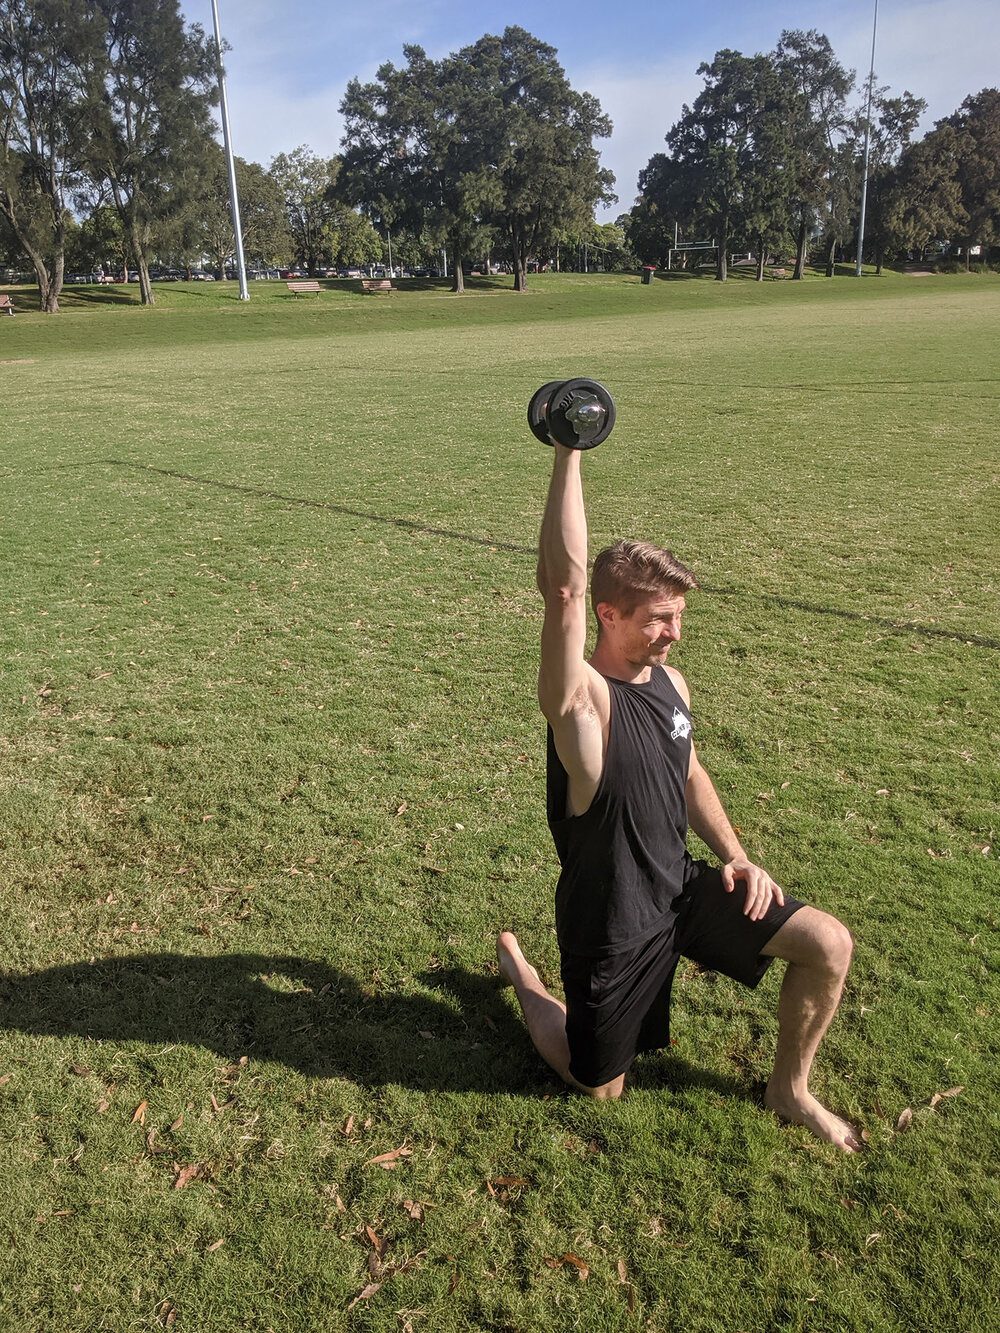
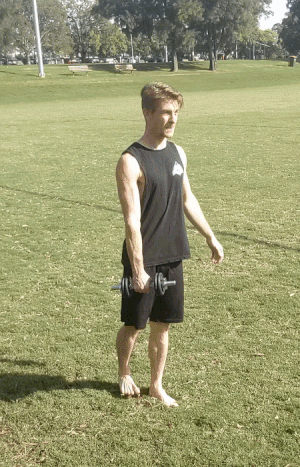
Take a light weight in one hand and hold at your shoulder. Make sure your stance is stable so you can drive the weight up.
The key here is to try not to twist and to stop your ribs ‘flaring’ or lifting. If you keep your core tight, you’ll look after your back and keep from losing balance.
If you’re a bit uncertain of keeping stable through the press, you take a seat but try to keep your torso long, and your core engaged when practising for the standing version.
Add these in after a hang workout, or as their standalone session - start with 2-5 sets of 8-15 reps and a weight you can manage.
Stick to it, and you’ll be training smarter through your off-periods. These basic exercises will see you stronger and more resilient when you can return to the gym, walls or crags!
